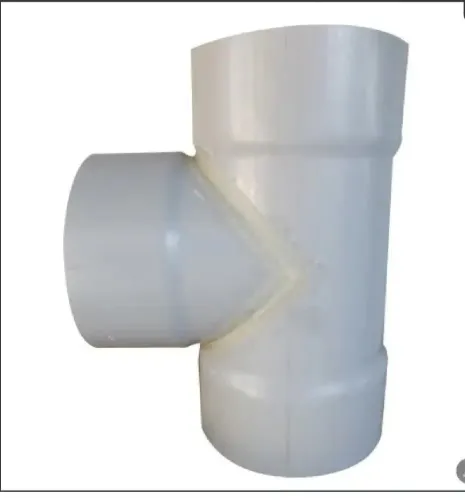

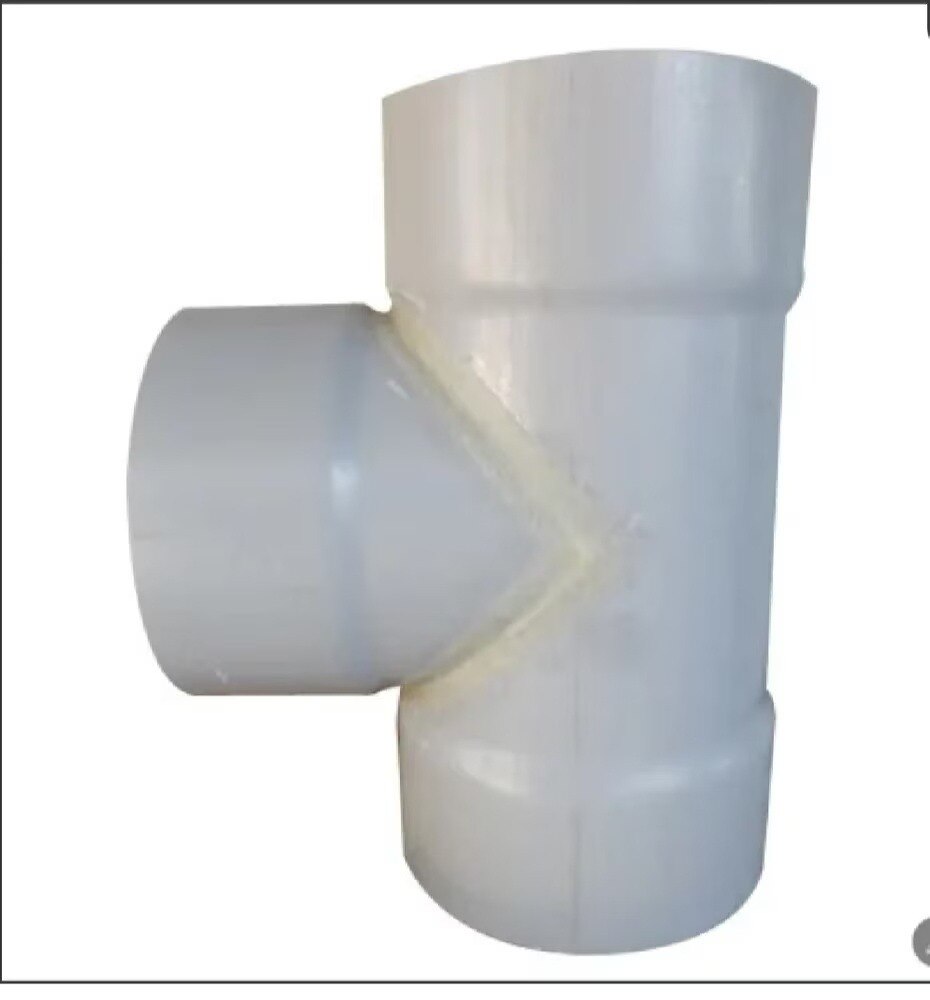
A leaking or shifting tee can fail because of poor socket preparation, incomplete insertion, branch movement, a damaged fabrication seam, or excessive pressure. By checking the fitting’s documents, dimensions, joints, alignment, cure condition, and test results in sequence, you can separate an installation fault from a defective tee and choose the correct repair.
Key takeaways
- Match tee material, dimensions, joining method, and pressure rating to the pipe system.
- Inspect sockets, spigots, seams, and branch alignment before applying solvent cement.
- Trace leaks, misalignment, and cracking to the specific joint or fabricated seam.
- Test only after correct surface preparation and the manufacturer’s full cure time.
Confirm the Tee and Pipe Are Compatible Before Assembly
Do not assemble the tee until its dimensions, material, joining method, and pressure limits match the pipe system. A PVC fabricated tee can have a different pressure rating from a molded tee with the same nominal size.
1. Compare the tee and pipe’s nominal diameter and actual outside diameter. Confirm that the pipe material grade matches the tee and that both are approved for the same solvent-cement, threaded, flanged, or mechanical joining method.
2. Check the fabrication drawing for socket depth, required insertion depth, branch geometry, wall thickness, and every fabrication seam. Verify the allowable pressure and temperature range; do not accept a tee based on nominal size alone.
3. Clean and dry the pipe end and socket before checking fit. Mark the pipe at the specified insertion depth, push it to the fitting stop, and confirm that the mark reaches the socket edge. Exposed pipe length is unreliable because socket geometry varies.
4. Reject the connection for an annular gap, incomplete insertion, damaged or oval pipe, raised cement bead, uncured cement, whitening, crazing, bubbles, distortion, or a crack at the socket shoulder. A smooth outside surface does not prove full bonding.
5. Check that the branch can align without force. Verify nearby supports, anchors, and guides; unsupported piping, settlement, vibration, or thermal movement can load the tee and crack a seam even when the socket dimensions match.
Inspect Sockets, Spigots, Seams, and Branch Alignment
Reject the tee before assembly if a socket, spigot, or fabrication seam is damaged, contaminated, or visibly distorted. This is how to check PVC fabricated tee connection problems before and during installation:
1. Isolate the branch and run where possible, then clean and dry every joint. Dirt, water, and uncured cement can hide a leak path.
2. Examine each socket and spigot for incomplete insertion, ovality, an annular gap, a raised or uneven cement bead, localized whitening, crazing, bubbles, or distortion. Mark the insertion depth on the pipe before assembly; the mark should reach the socket shoulder after insertion.
3. Inspect every longitudinal and circumferential fabrication seam, not just the pipe-to-tee sockets. Reject a crack extending from a socket shoulder, branch body, or seam. A smooth outer surface does not prove that the socket bonded through its full engagement length.
4. During dry fit and final positioning, keep the branch and run coaxial with their pipes. Do not pull, twist, or force the pipe into alignment. Check that supports, guides, and anchors prevent unsupported branch weight, settlement, vibration, or thermal movement from loading the tee.
5. For a threaded branch, inspect the female threads for splitting or distortion. Excessive wrench torque, a metal male thread, incompatible sealant, or a fitting that bottoms before sealing can crack the PVC.
A localized wet ring or repeatable pressure loss at one socket points toward a joint problem. A crack through the tee body or seam requires tee replacement, not more cement or external sealing.
Trace the Warning Sign to the Actual Failure
A dry joint with a wet ring at one socket points to a connection leak, not automatically a cracked tee. Isolate the branch and run where possible, dry every surface, then observe whether the same location wets or loses pressure.
- Solvent-cement failure: the pipe is not fully inserted, the socket gap is visible, or cement coverage is uneven. A dry-fit joint that resisted insertion proves nothing; inadequate cleaning, primer, cement, or hold time can let pressure separate the socket.
- Pipe movement or forced alignment: the leak returns after settlement, vibration, thermal movement, or support changes. Look for unsupported branch piping, shifted guides, stressed anchors, or a tee that was pulled into alignment during assembly.
- Cracking: a sharp line appears in the tee body, branch shoulder, pipe wall, or fabricated seam. A split branch or failed seam is not repaired by adding solvent cement, epoxy, tape, or heat; remove and replace the tee.
- Excessive pressure: the joint stays dry at rest but leaks or the pipe deforms only during testing or operation. Compare the measured pressure with the tee’s allowable pressure, wall thickness, fabrication drawing, and pressure rating; a fabricated tee is not automatically equivalent to a molded fitting.
Do not use early pressure testing to confirm the diagnosis. Cure time depends on size, fit, temperature, humidity, cement, and ventilation, so follow the cement and fitting manufacturer’s cure table and the project specification. Premature testing can hydraulically separate a sound-looking joint and create new PVC tee joint problems.
Test the Joint Only After Correct Preparation and Cure
Clean and dry every bonding surface before assembly; dirt, moisture, burrs, or an oval pipe end can create a leak that pressure exposes later. A pvc fabricated tee inspection must also include each longitudinal or circumferential fabrication seam, not only the pipe-to-tee sockets.
1. Verify the fabrication drawing, material grade, wall thickness, joint type, socket depth, and allowable pressure. Use the purchase specification and applicable fabrication standard for acceptance; do not substitute criteria for a molded fitting automatically.
2. Cut pipe ends square, deburr them, and remove surface oxidation from the bonding area. Dry-fit each connection to confirm full insertion without forcing the branch into alignment. Support, anchor, and guide nearby piping so settlement, vibration, thermal movement, or unsupported weight cannot bend the tee.
3. Apply the specified PVC primer and solvent cement using the cement manufacturer’s instructions. Assemble immediately to full socket depth, twist only as instructed, and hold the joint steady while it sets. Do not disturb, back out, or load it during cure.
4. Wait for the cement and fitting manufacturer’s cure table and the project specification to authorize testing. Cure depends on pipe size, fit, temperature, humidity, cement type, and ventilation; a short fixed wait can hydraulically separate an apparently sound joint.
5. Isolate the branch and test run where possible, dry the joints, and use hydrostatic testing at the specified pressure and hold time. Never exceed the lowest-rated tee or temporary component. Record pressure loss, seam condition, socket engagement, and any leak; never use compressed air to compensate for inadequate cure.
Choose the Right PVC Tee Maintenance or Repair
Replace the tee instead of patching it when the body, branch, or a fabricated seam is cracked, split, deformed, or leaking after proper curing. External solvent cement, epoxy, tape, and heat do not restore the fitting’s pressure rating.
| Option | Decision | When it applies |
|---|---|---|
| PVC tee maintenance | Keep and monitor | The tee is dry and intact; check seepage, crazing, impact marks, UV embrittlement, chemical attack, support sag, and unauthorized connections during scheduled inspections. |
| Temporary repair | Use only for isolation or controlled shutdown | Apply only as a short-term containment measure after isolating and depressurizing the line. Do not return a cracked or seam-failed tee to normal service on a patch. |
| PVC pipe tee repair | Cut out and replace | Use an approved coupling or repair coupling when one socket, the tee body, or a seam has failed. Preserve insertion depth, alignment, and restraint. |
| New fabricated tee | Obtain a replacement fitting | Choose this when the existing tee has the wrong wall thickness, pressure rating, material, geometry, or undocumented fabrication. |
Before ordering, compare the fabrication drawing, joint type, nominal and outside diameter, socket depth, wall thickness, allowable pressure, and temperature range. A repair coupling must also suit the tee geometry and end-stop arrangement.
Swapnil Enterprises can be asked to review those dimensions and seam details before a replacement is fabricated. Never reshape an installed tee with flame or uncontrolled hot air; heat can create hidden degradation and a later rupture.
Related products
 | PVC FABRICATED TEE Our PVC Fabricated Tee is a high-quality, durable solution for various plumbing and construction needs. View product → |
 | Fabricated PVC Fittings Fabricated PVC fittings are custom-shaped fittings, often for larger diameters, made by cutting, bonding, and thermoforming segments of existing PVC... View product → |
Frequently asked questions
How do you confirm a PVC fabricated tee is compatible with the pipe?
Compare the tee and pipe material, nominal dimensions, joining method, and pressure limits before assembly. Do not assume a fabricated tee and molded tee with the same nominal size have the same pressure rating.
What parts of a PVC fabricated tee should you inspect?
Inspect each socket and spigot for damage, check fabricated seams for gaps or cracking, and confirm that the branch is aligned with the intended pipe route.
What causes common PVC tee joint problems?
Trace the warning sign to its source. A leak can indicate poor surface preparation or an incomplete joint, while misalignment can indicate incorrect insertion or a distorted socket. Cracks at a seam require inspection of the fabrication rather than repeated sealing.
When can you test a PVC tee connection?
Test the connection only after cleaning, fitting, joining, and allowing the specified solvent-cement cure time. Testing too early can disturb the joint and produce a misleading result.
How do you choose PVC tee maintenance or repair?
Repair a correctable joint-preparation fault only after removing the affected connection and preparing it again. Replace the tee when the body, seam, socket, or branch is cracked, distorted, or outside the system’s pressure requirements.